Welcome to the forum. Although you can post in any forum, the USA forum is here in case of local regs or laws

View the thread, titled "Leaking copper pipe" which is posted in UK Plumbers Forums on UK Plumbers Forums.

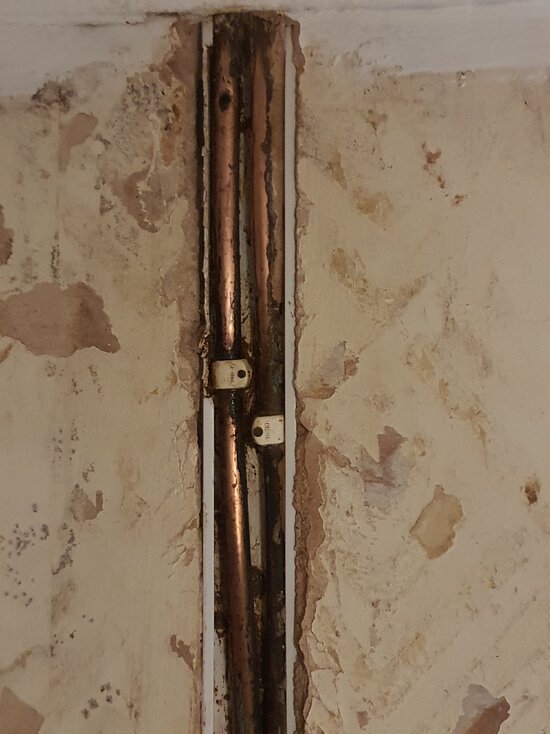
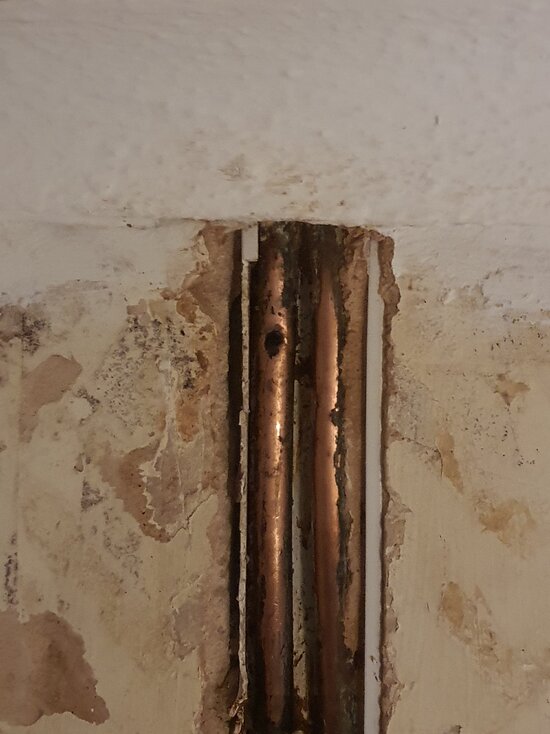
Hi - totally new here and really need some advice. I have a pin hole in a 10mm copper wall pipe that supplies a nearby radiator. The hole is about 4cm from the bottom of coving. I have looked at the repair patches but these are for 15mm pipe as are the other fixes available - cannot find it in 10mm. The leak is a dribble with everything on so not pouring out but leaking. I have had 3 plumbers come and look at the leak and the advice has been different on each one and the prices seem too much.

One has said that he will have to access through upstairs floor (bedroom with laminate flooring) cost approx 650-700.

Another has said that he will drain the pipe and solder cost approx 380.

Final one said he can take more wall out either side and replace bit of piping cost approx 420.

None of them can give me an idea of how long it will take so it's difficult to work out the pricing structure.

Should also mention that there is no give in the pipe at all and no gap between wall and pipe so it's difficult to see if the hole has gone all the way through.

Please advise - pictures can be posted.

Thanks Connie

 
You could try ptfe but normally there’s a reason why it’s leaking

Won’t harm stripping the joint once drained to inspect etc
Understood & thank you - I guess I'm not going to know until I open it up what he's left behind. This seems the easiest of the three to tackle but has the worst leak - I don't think he used tape, etc and these were offered to him. I am hoping thats the reason for the leaks. He told me it was not necessary for new valves but my understanding is to use these even on a new fitting.
 
Understood & thank you - I guess I'm not going to know until I open it up what he's left behind. This seems the easiest of the three to tackle but has the worst leak - I don't think he used tape, etc and these were offered to him. I am hoping thats the reason for the leaks. He told me it was not necessary for new valves but my understanding is to use these even on a new fitting.
Hi - after closer inspection and tests I have found the leak near the bottom of the pipe - I have marked it with tape and attached a picture. I'm still testing the nut but I think that's OK. Any advice on next my next move?

Thanks
 

Attachments

  • 20250406_020720.jpg
    20250406_020720.jpg
    778.7 KB · Views: 23
Get to clean un bent pipe and adapt from there
Just wanted to update - another plumber has been today - one of the leaks was getting worse (don't know why) - he told me that there was no leak on the pipe of the other one - I showed him and he said it I was incorrect. He checked the fittings on all three and tightened them but he did say that it was a wait and see and if they did leak he would have to undo the other guy's work and start again. I agreed and expected this - the original work is shoddy to say the least. The boiler is back on and the guy today did check the tank in the loft - first plumber in 5 who has - he went to number 1 on the list just for that because none of the others could be persuaded to go up in the loft. I checked the pipe earlier today after he left and there is a leak the pipe!! - which only I can see apparently - I even think there might be two nicks on it. I made a video and sent it to today's plumber and he's going to come back in the week. The other two are also still leaking but not as bad as they were. The radiators all seem to be out of sequence to what they were last week - some getting hot and some not but I'm leaving that until I know that everything is leak free - I have bled them again this evening just to release any air so everything else keeps moving. Today's plumber's opinion of the other guy was that the fittings were not tight enough but based on that theory they should be OK now??.

I feel that the only way forward is to strip it all back and start again - I am of course concerned that l end up at square one and the new work also leaks but want an end to it. I've asked so many people to recommend a competent plumber but it seems you guy's are hard to find and I thank everyone that took time out to reply & read this post - you all talked far more sense than the ones I have dealt with in the past month.

Final questions so I'm armed for the next visit.

How would you repair the pipe from the image I sent? - the leak is just above the bend & I still think there might be one on the opposite side. I wanted to know how you guy's would do it once the pipes been cleaned & location of leak/s confirmed. Is it a case of build it back up with a fitting? - this has been done on the other 2 and their leaking including the one without the slanted brass nut "display"

Would you use tape or other on new fittings to ensure a tighter fit?

New copper pipe should always be used? (for new joins)

I did not see the first or second plumber use any tape, one used old copper pipe that was in his bucket and I didn't see them deburr any pipes. When I've done plumbing here I do all 3 and thought it was standard practice and if it is I want to ensure that that these steps are not missed on "the rebuild"

Thank you
Hi Connie,

I've been following this heating saga with interest. First, I'm glad you got the pipework with the hole in it fixed, but unfortunately you are having problems with the rad valves, so here's my 10 pence worth.

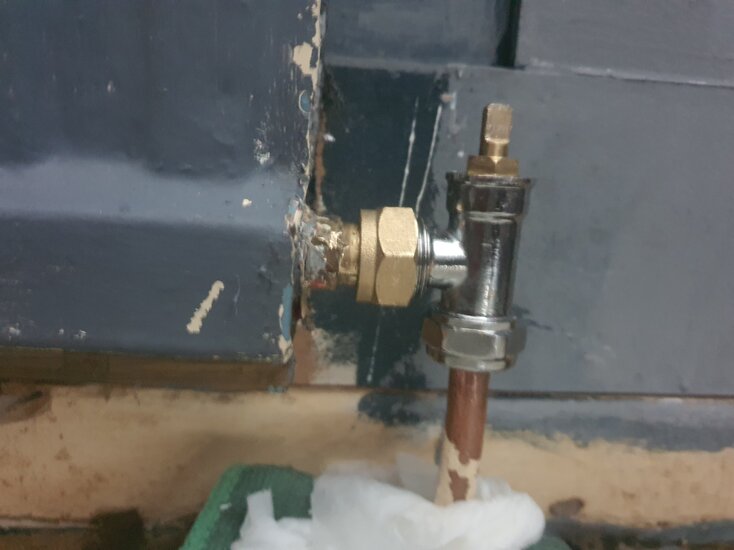
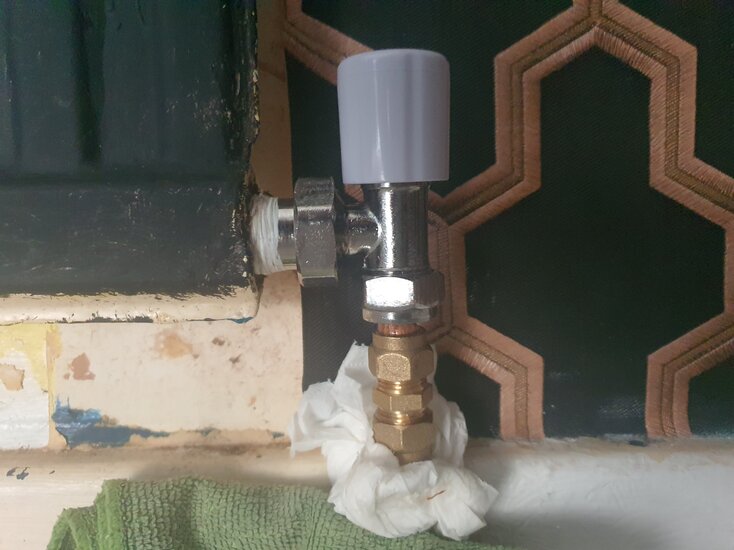
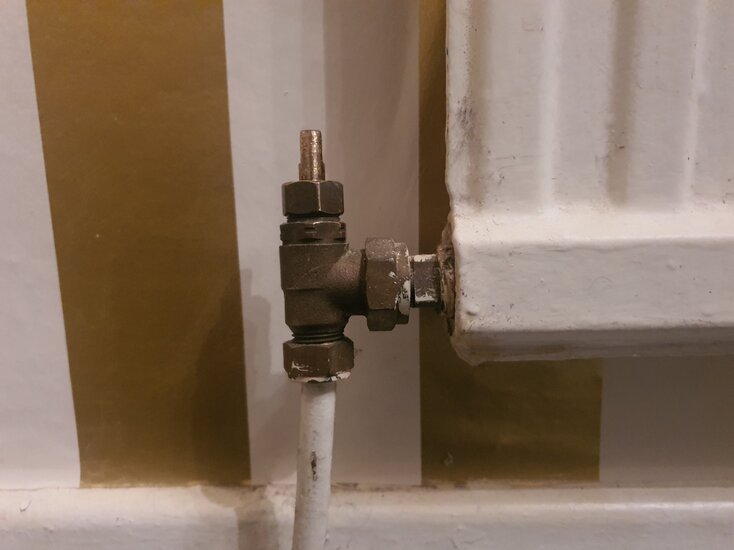
Looking at the pictures of the valves that are leaking seem to be 15mm chrome valves with a 15mm x 10mm internal reducer? Correct?

The problem with 10mm copper pipe is that it's quite soft compared to normal 15mm copper pipe, and is easily deformed by an over tightened olive. Once that happens no amount of fiddling with it will cure the leak which seems to be what the plumbers who have attended have done.

In my opinion and what I would do is (if there's enough slack in the pipe work) is cut off the old 10mm olive back to usable clean (remove old paint and muck etc.) pipe and replace it. Some internal reducers have a 'built in olive' therefore you have to replace the whole reducer. With the replacement, use a jointing paste and when it's tightening time, get it finger tight first then just quarter to half turn with a spanner. If it still leaks a quarter turn more which should do the trick.

Hope this helps.
Hi - thanks for the detailed reply regarding the saga - perfect description.

I hadn't realised about the 15mm fitting but it makes sense now you've pointed that out.

The plumber from Sunday is coming to do the repairs on Wednesday - he has good reviews so I'm hoping this will end the saga. Slightly concerned that he didn't see the leak on the pipe but I didn't spot it either straight away - fingers crossed.

Thanks
Just to clarify the pipe on the radiator hasn't been fixed yet - he could not see it on Sunday so I sent him a video to confirm it was there and I think the valve also has a leak. My original leaking wall pipe was fixed and seems to be ok. Thanks
 
Hi Connie,

I've been following this heating saga with interest. First, I'm glad you got the pipework with the hole in it fixed, but unfortunately you are having problems with the rad valves, so here's my 10 pence worth.

Looking at the pictures of the valves that are leaking seem to be 15mm chrome valves with a 15mm x 10mm internal reducer? Correct?

The problem with 10mm copper pipe is that it's quite soft compared to normal 15mm copper pipe, and is easily deformed by an over tightened olive. Once that happens no amount of fiddling with it will cure the leak which seems to be what the plumbers who have attended have done.

In my opinion and what I would do is (if there's enough slack in the pipe work) is cut off the old 10mm olive back to usable clean (remove old paint and muck etc.) pipe and replace it. Some internal reducers have a 'built in olive' therefore you have to replace the whole reducer. With the replacement, use a jointing paste and when it's tightening time, get it finger tight first then just quarter to half turn with a spanner. If it still leaks a quarter turn more which should do the trick.

Hope this helps.
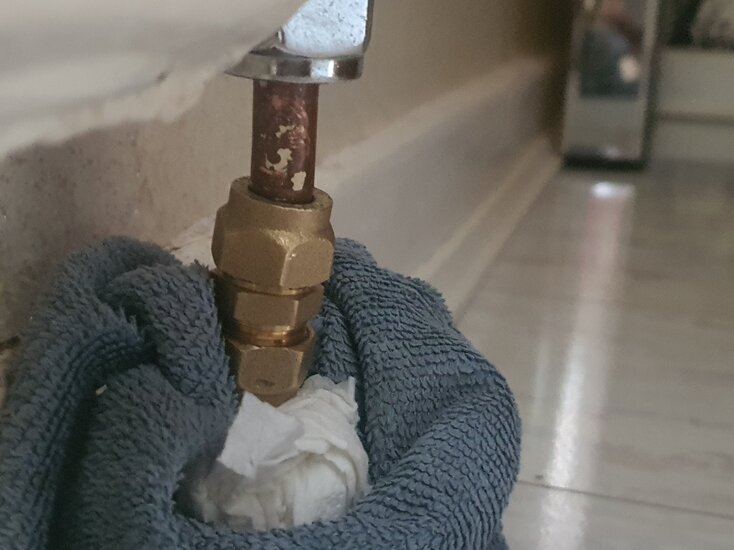
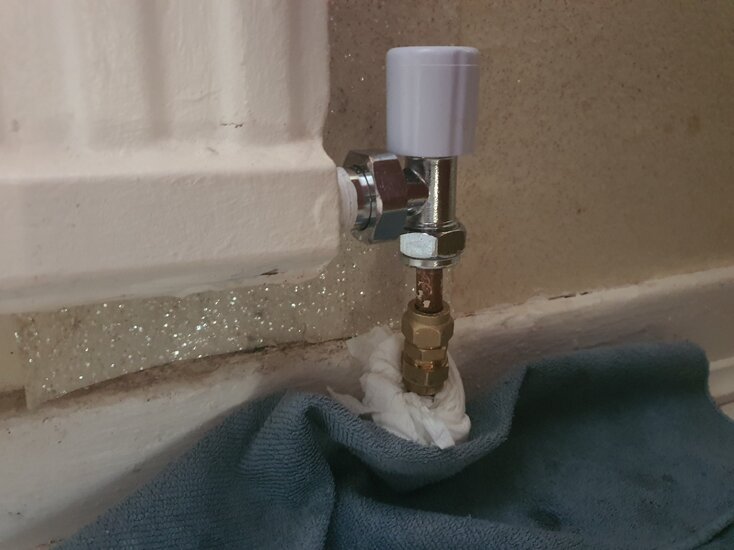
Today's update to this saga. The plumber has managed to fix all three valves (I think). Apparently two of the pipes to the radiators were 8mm and not 10mm - this was new information for me The first guy had fitted 10-15mm reducers so this was the main factor of the leaks. I'm happy with the guy that's done the work today, however he has denied twice that there is a leak on the radiator pipe - I sent him a video and before he started today he confirmed it was the valve and not the pipe. I told him it was both but he did not accept this. This evening the pipe is wet near the base - I have put tissue under the nuts and it is dry - if you get really close with lighting bubbles appear not drips and I am 99.9% certain that it's the pipe.

Can somebody advise me what course I should take here - 2 plumber's have said "no leak on pipe" - one has stated it twice. I feel like I'm going mad over this - the pipe could of and should of been fixed today with the valve but I can't seem to convince anybody that the pipe is leaking and fed up with paying for groundhog day and this whole saga. What next please.

Thanks
Hi Connie,

I’m a tad confused. Is the leak from the base of the valve or from the actual pipe? Any chance of some pictures of both the offending valve and pipe, thanks.

Just an after thought. Could you also check the plug or air vent above the valve at the top side of the radiator. Sometimes they have a tiny leak and it runs down the back or between panels and show at the valve.

Hope this helps.
 
Last edited:
Hi Connie,

I’m a tad confused. Is the leak from the base of the valve or from the actual pipe? Any chance of some pictures of both the offending valve and pipe, thanks.

Just an after thought. Could you also check the plug or air vent above the valve at the top side of the radiator. Sometimes they have a tiny leak and it runs down the back or between panels and show at the valve.

Hope this helps.
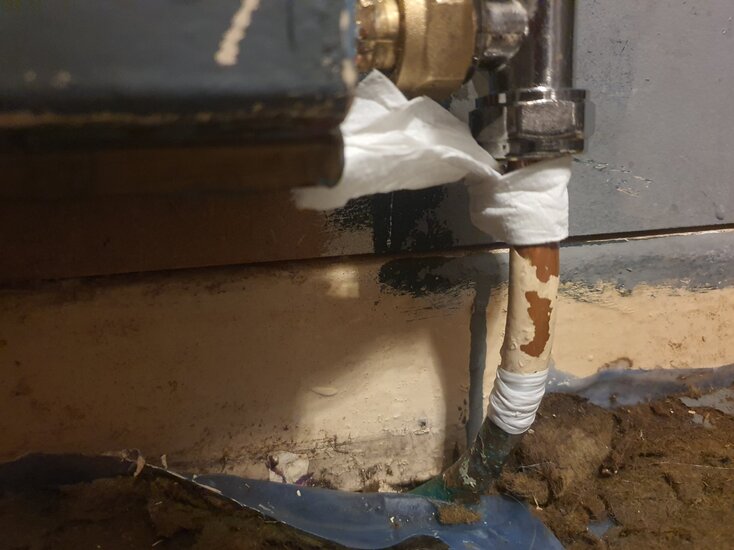
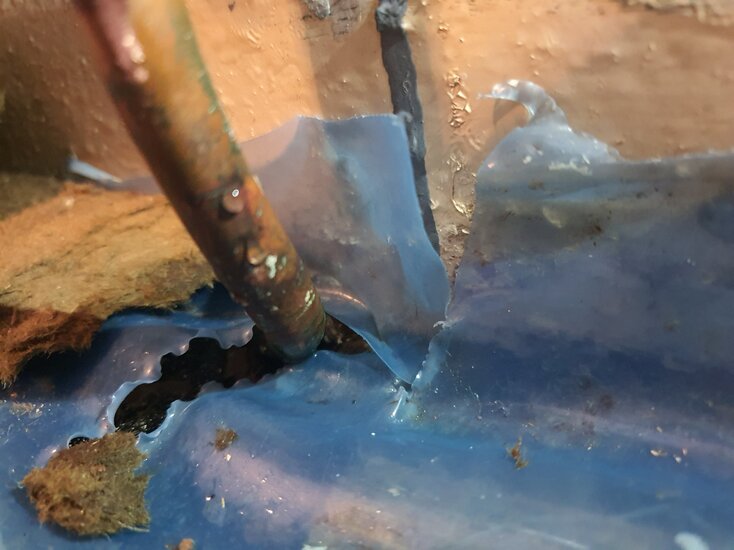
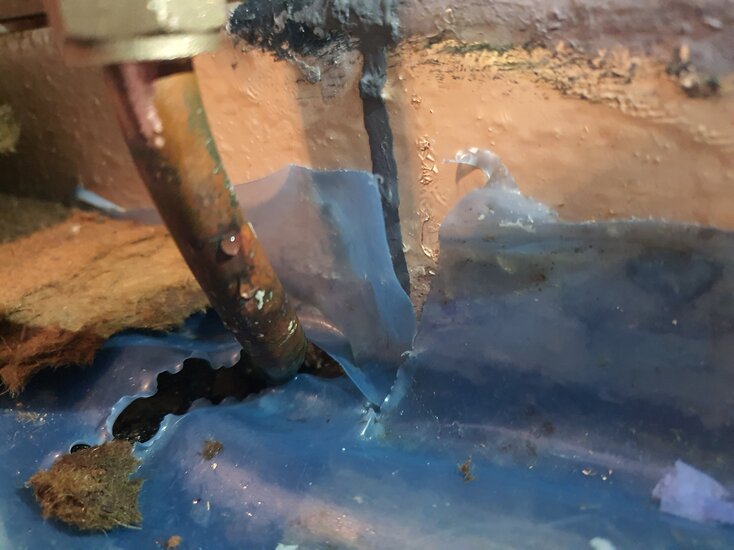
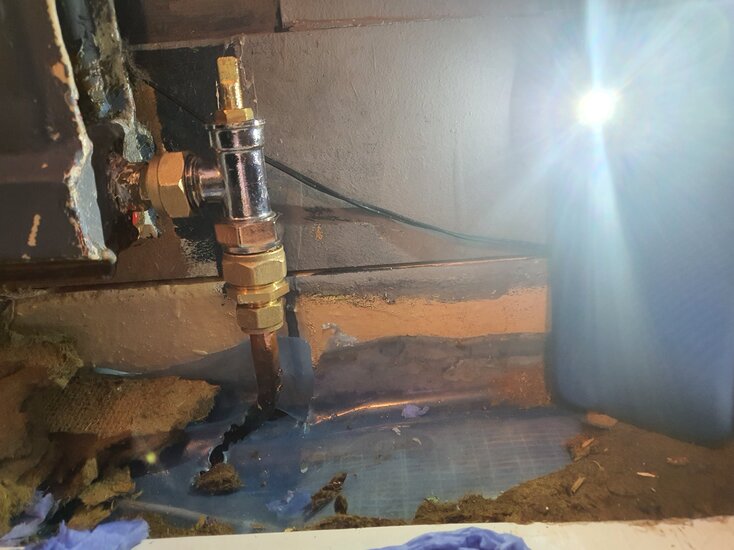
Hi - thanks for replying. The air vent/valve is on the opposite side and seems OK. I left tissue under the nut and that has become wet overnight. I have maintained that there are maybe two leaks on the pipe as well - this has been denied three times. Two bubbles appear from the pipe and if you look closely there seems to be "two nicks" in the same place - picture attached which I think shows it. I have sent a video to the guy from yesterday who has not got back to me yet - I keep showing the leak and get told I'm wrong???

Thanks
 

Attachments

  • 20250410_170230.jpg
    20250410_170230.jpg
    710.5 KB · Views: 9
  • 20250410_170234.jpg
    20250410_170234.jpg
    738.9 KB · Views: 9
  • 20250410_170246.jpg
    20250410_170246.jpg
    811.8 KB · Views: 8
Hi - thanks for replying. The air vent/valve is on the opposite side and seems OK. I left tissue under the nut and that has become wet overnight. I have maintained that there are maybe two leaks on the pipe as well - this has been denied three times. Two bubbles appear from the pipe and if you look closely there seems to be "two nicks" in the same place - picture attached which I think shows it. I have sent a video to the guy from yesterday who has not got back to me yet - I keep showing the leak and get told I'm wrong???

Thanks
Hi Connie,

Looking at the series’s of photos you posted it looks like the water is seeping through the copper via a nick in the pipe. I think it’s a problem best solved in person and not from looking at pictures.

Show these photos to the plumber who turns up and see what he says.

If the water is leaking from a nick in the pipe you can either cut the pipe back to where it’s under the floor and replace it from there ( best solution) or if you want to chance it, solder over the nicks (not a good method).

Hope this helps.
 

Official Sponsors of Plumbers Talk

Reply to the thread, titled "Leaking copper pipe" which is posted in UK Plumbers Forums on Plumbers Forums.

We recommend City Plumbing Supplies, BES, and Plumbing Superstore for all plumbing supplies.

Thread starter

Joined
Location
MANCHESTER
Member Type
DIY or Homeowner

Thread Information

Title
Leaking copper pipe
Prefix
N/A
Forum
UK Plumbers Forums
Start date
Last reply date
Replies
35
Unsolved
--

Thread Tags

Tags Tags
pipe

Thread statistics

Created
Connie194,
Last reply from
Rtplumb,
Replies
35
Views
1,691

Weekly or Monthly Email Digest

Back
Top